|
||||
Mounting Solution - Front Side Wall Mount
Mounting solution is a collection of different kinds of mounting methods that can help you to know how to mount your product correctly and rapidly. Mounting solution can also guide you to find the product that really fit your needs. |
||||
| __________________________________________________________________________________________________________ | ||||
Overview - Front Side Wall Mount (Panel PC)Assembly DiagramPanel PC and Display 5.7" ~ 17" 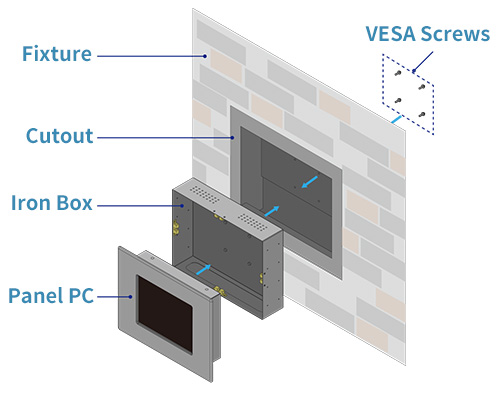 |
||||
| __________________________________________________________________________________________________________ | ||||
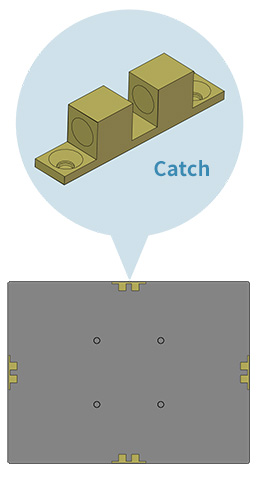
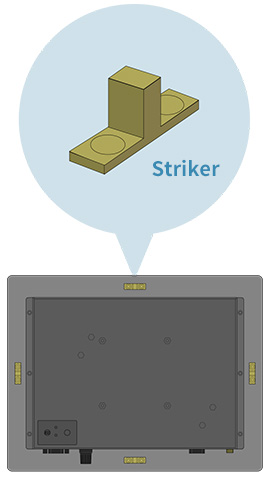
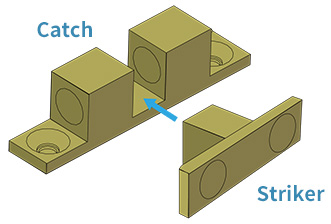
Front Side Mounting KitA set of Front Side Mounting Kit is composed of a striker and a roller catcher. The striker is located on the four sides of front bezel. The roller catcher is fixed on the front housing. When combining the front bezel with the open frame housing strikers will be locked into the roller catches.
 |
||||
| __________________________________________________________________________________________________________ | ||||
Installation Steps
Step 1Make a cutout on the fixture (ex. wall) according to the cutout dimension of the iron box. Note: All installation processes are done from the front side of the fixture. 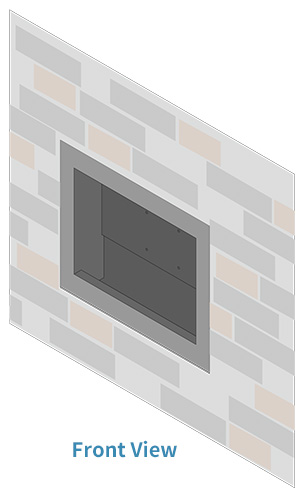
Step 2Use VESA Mount Kit (not supplied by Winmate) to fix the iron box to the fixture. 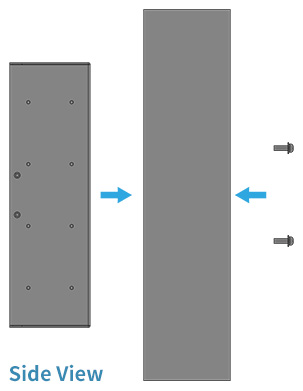
Step 3Insert the Panel PC into the iron box. Make sure that strikers on the rear side of the Panel PC match catches on the front side of the iron box. 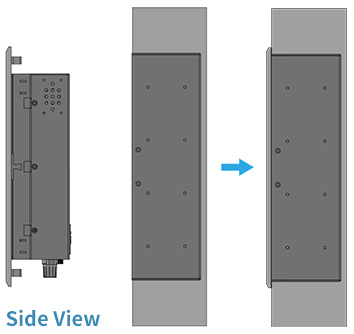
Step 4Installation complete. 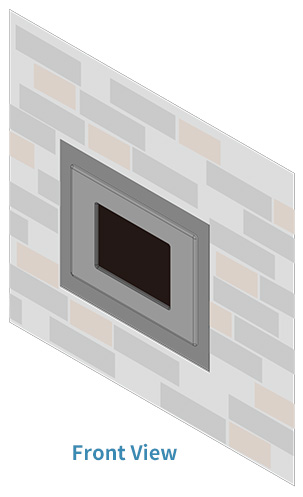 |
||||
| __________________________________________________________________________________________________________ | ||||
Replacing the Panel PCIf you want to replace the Panel PC, it is easy and convenient to do it by yourself. Just pull the old Panel PC out of iron box and insert the new one. 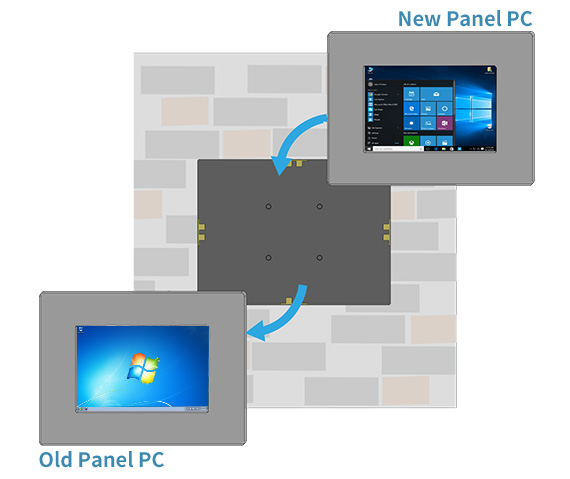 |
||||