 |
Advantages
|
-
 Long standoff distance from the measuring object Long standoff distance from the measuring object
-
 Safe distance with critical measurements Safe distance with critical measurements
-
 Small light spot enables measurements of small parts Small light spot enables measurements of small parts
-
 Fast and precise measurements Fast and precise measurements
|
|
|
Characteristics
|
-
 Measuring ranges from 0.5 to 1000 mm Measuring ranges from 0.5 to 1000 mm
-
 Resolution from 0.03 μm Resolution from 0.03 μm
-
 Linearity from 1 μm Linearity from 1 μm
-
 Measuring rate up to 49 kHz Measuring rate up to 49 kHz
|
|
|
|
Note:
-
 Measurement can be affected by harsh environmental conditions (condensation, dust) Measurement can be affected by harsh environmental conditions (condensation, dust)
-
 Protection housing compensates for critical environments Protection housing compensates for critical environments
|
|
|
 |
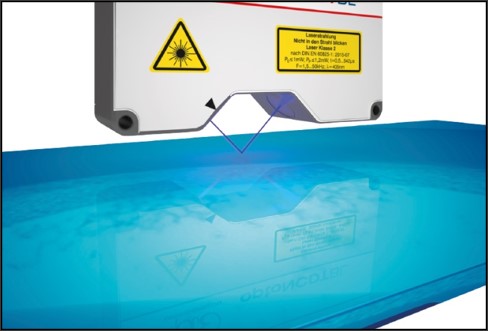
 No penetration of the blue-violet laser beam due to short wavelength
 Stable & precise measurement results
|
|
 Patented for ME BL laser sensors: measurement tasks on red-hot glowing metals exceeding 700 °C and on transparent objects such as plastics, adhesives and glass Patented for ME BL laser sensors: measurement tasks on red-hot glowing metals exceeding 700 °C and on transparent objects such as plastics, adhesives and glass
 Patented for ME BL laser sensors: measurement tasks on red-hot glowing metals exceeding 700 °C and on transparent objects such as plastics, adhesives and glass Patented for ME BL laser sensors: measurement tasks on red-hot glowing metals exceeding 700 °C and on transparent objects such as plastics, adhesives and glass
|
|
|
|
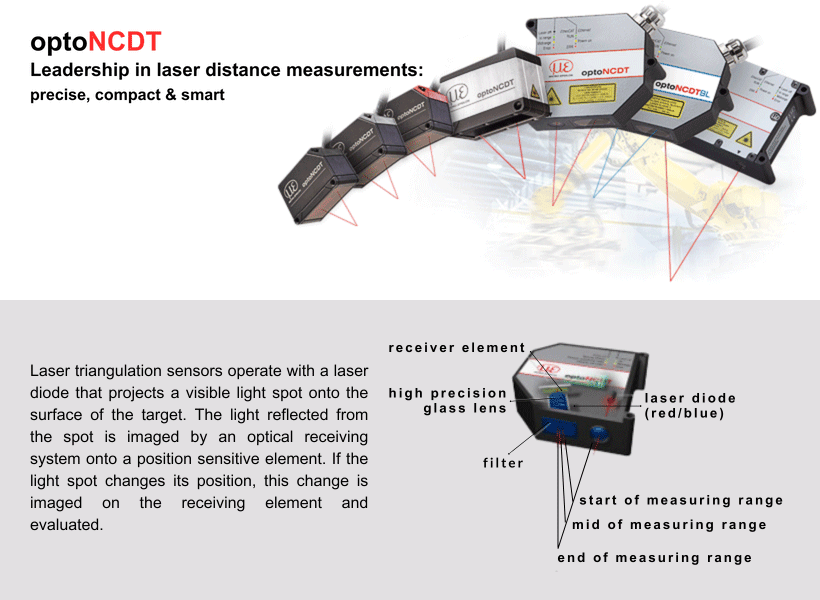
optoNCDT Laser Triangulation Sensors
|
|
|
Precise distance measurements on rough and structured surfaces
|
|
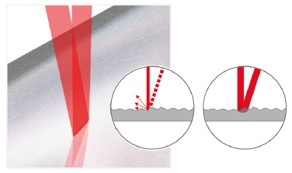
Rough and structured surfaces cause interferences within the laser point (left) which leads to a faulty projection on the sensor element. This effect becomes particularly obvious with metallic surfaces. The small laser line of the optoNCDT LL sensors compensates for this effect (right) and enables stable measurements on metallic surfaces.
|
|
 |
|
|
|
Precise and stable measurements on metallic surfaces
|
|
Laser-line sensors for reliable measurements on metallic surfaces
The optoNCDT LL sensors operate with a small laser line. The laser line and special software algorithms compensate for disturbances caused by surface roughness, defects, indentations or minute holes on metallic surfaces. This is how optoNCDT LL sensors achieve the highest precision with measurement tasks involving metals.
|
|
 |
|
|
|
Precise distance measurements on reflecting surfaces
|
|
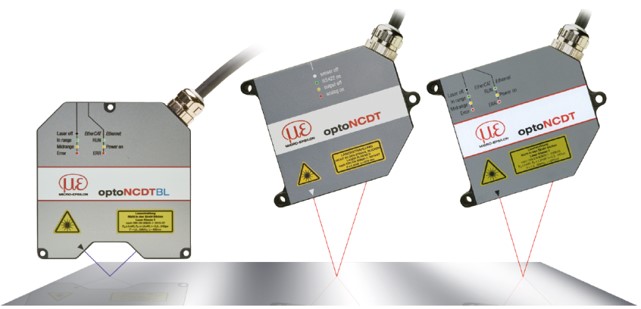
Requires special sensor alignment for reflecting surfaces:
angle of incidence = angle of reflection
|
|
 |
|
Specially aligned DR sensors from Micro-Epsilon provide high accuracy and signal stability on directly reflecting surfaces
|
|
 |
|
|
|
Multiple measuring ranges for versatile measurement tasks
|
|
|
|
|
Long-range sensors for measurements from a safe distance
|
|
|
|
|
Unique ease of use
|
-
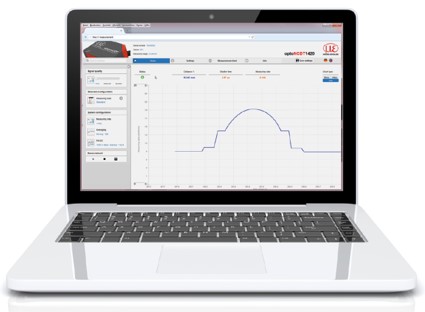
 Intuitive operation via web interface Intuitive operation via web interface
-
 Diverse options for processing values and signals, e.g., filters, peak selection Diverse options for processing values and signals, e.g., filters, peak selection
|
|
 |
|
|
|
|
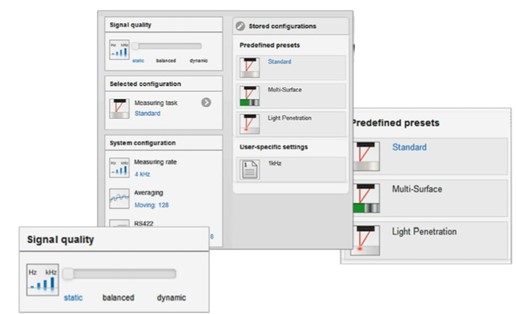
The quality slider enables the user to define the signal evaluation regarding process and measurement dynamics. Depending on the selected settings, the measuring rate and the averaging of the sensor are adapted. |
|
 |
|
Wiith the pre-sets, predefined sensor settings for specific measuring objects can be quickly and easily adopted.
e.g., metal, ceramics,...
e.g., circuit boards, PCB,...
e.g., milk glass, plastics,....
|
|
|
|
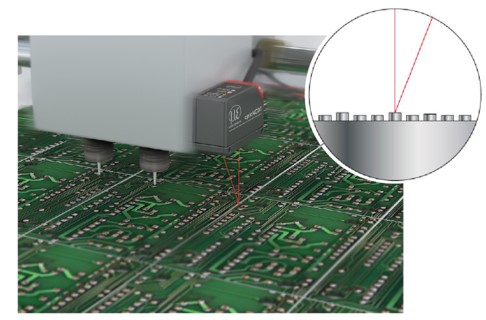
Ultra-small light spot detects finest details and structures
|
-
 High spatial resolution for detection of smallest objects High spatial resolution for detection of smallest objects
-
 Sensors with measurement spot from 23 µm Sensors with measurement spot from 23 µm
|
|
 |
|
|
|
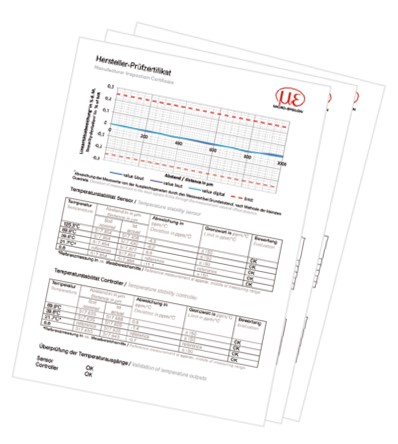
Certified precision
|
|
Calibration certificate of all supplied sensors confirms the achieved performance
|
|
 |
|
|
|
High precision with changing surfaces
|
|
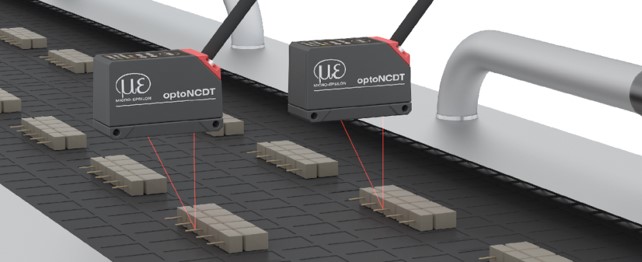
optoNCDT sensors are equipped with intelligent control features which ensure high signal stability with bright/dark transition, regardless of the color and the brightness of the measuring object. This optimally adjusts the exposure time or the amount of light for the exposure cycle just performed or the next exposure cycle. These controls enable smooth signal courses without outliers even in dynamic measurements.
|
|
 |
|
|
|
Active-Surface-Compensation
|
|
|
|
|
|
|
 |
|
The Active Surface Compensation provides stable distance signal control regardless of target color or brightness.
|
|
|
|
|
 |
|
The Advanced Surface Compensation feature operates with new algorithms and enables stable measurement results even on demanding surfaces.
|
|
|
|
|
 |
|
The real time surface compensation feature compensates for changing reflectance properties in the current measurement cycle. Each individual laser pulse is controlled in real time depending on the surface properties of the measuring object.
|
|
|
|
|
 |
|
The Advanced Real Time Surface Compensation with its improved dynamic range enables a more precise real time surface compensation. This ensures maximum compensation of fluctuating reflectivity while generating stable measurement values with high accuracy.
|
|
|
|
|
|
 |
|
Low costlaser displacement sensor for automation
optoNCDT 1220
 Measuring ranges 10 | 25 | 50 mm Measuring ranges 10 | 25 | 50 mm
 Linearity from 10 µm Linearity from 10 µm
 Repeatability from 1.0 µm Repeatability from 1.0 µm
 Measuring rate 1 kHz Measuring rate 1 kHz
|
|
|
|
|
 |
|
Compact laser triangulation displacement sensor with integrated controller
optoNCDT 1320
 Measuring ranges 10 | 25 | 50 | 100 mm Measuring ranges 10 | 25 | 50 | 100 mm
 Linearity from 10 µm Linearity from 10 µm
 Repeatability from 1 µm Repeatability from 1 µm
 Measuring rate 2 kHz Measuring rate 2 kHz
|
|
|
|
|
 |
|
Smart laser triangulation sensor with integrated controller
optoNCDT 1420
 Measuring ranges 10 | 25 | 50 | 100 | 200 | 500 mm Measuring ranges 10 | 25 | 50 | 100 | 200 | 500 mm
 Linearity from 8 µm Linearity from 8 µm
 Repeatability from 0.5 µm Repeatability from 0.5 µm
 Measuring rate 4 kHz Measuring rate 4 kHz
|
|
|
|
|
 |
|
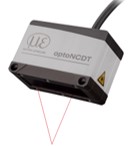
High precision laser displacement sensor for advanced automation
optoNCDT 1900
 Measuring ranges 2 | 10 | 25 | 50 | 100 | 200 | 500 mm Measuring ranges 2 | 10 | 25 | 50 | 100 | 200 | 500 mm
 Linearity from 1 µm Linearity from 1 µm
 Repeatability from 0.4 µm Repeatability from 0.4 µm
 Adjustable measuring rate up to 10 kHz Adjustable measuring rate up to 10 kHz
|
|
|
|
|
 |
|
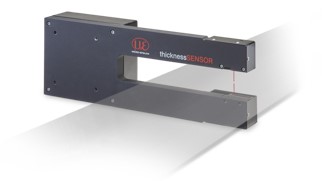
Sensor for precise thickness measurement
thicknessSENSOR
 Measuring ranges 10 | 25 mm Measuring ranges 10 | 25 mm
 Measuring width 200 mm // 400 mm Measuring width 200 mm // 400 mm
 Linearity from 10 μm Linearity from 10 μm
 Working gap 46 mm Working gap 46 mm
 Measuring rate 4 kHz Measuring rate 4 kHz
|
|
|
|
|
 |
|
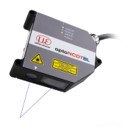
BLUE LASER Triangulation Displacement Sensor
optoNCDT 1750BL
 Measuring ranges 20 / 200 / 500 / 750 mm Measuring ranges 20 / 200 / 500 / 750 mm
 Linearity from 12 µm Linearity from 12 µm
 Repeatability 0.8 µm Repeatability 0.8 µm
 Measuring rate 7.5 kHz Measuring rate 7.5 kHz
|
|
|
|
|
 |
|
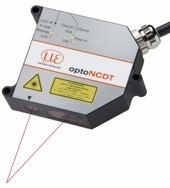
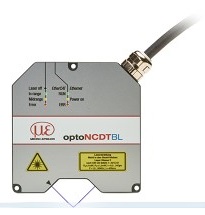
Highly dynamic laser sensor in 50 kHz class
optoNCDT 2300
 Measuring ranges 2 / 5 / 10 / 20 / 50 / 100 / 200 / 300 mm Measuring ranges 2 / 5 / 10 / 20 / 50 / 100 / 200 / 300 mm
 Linearity from 0.6 % Linearity from 0.6 %
 Resolution from 0.03 µm % Resolution from 0.03 µm %
 Measuring rate up to 49 kHz Measuring rate up to 49 kHz
|
|
|
|
|
 |
|
High precision laser displacement sensor with direct reflective
optoNCDT 2300-2DR
 Measuring ranges 2 mm Measuring ranges 2 mm
 Linearity 0.6 µm Linearity 0.6 µm
 Measuring rate 49 kHz Measuring rate 49 kHz
|
|
|
|
|
 |
|
Laser sensors for long stands off distances
optoNCDT 1710-50
 Measuring range 50 mm Measuring range 50 mm
 Offset distance 550 mm Offset distance 550 mm
 Sensor with integrated controller Sensor with integrated controller
|
|
|
|
|
 |
|
Laser sensors for long stands off distances
optoNCDT 1710-1000
 S ensor with integrated controller
 Measuring range 1000 mm Measuring range 1000 mm
|
|
|
|
|
|