


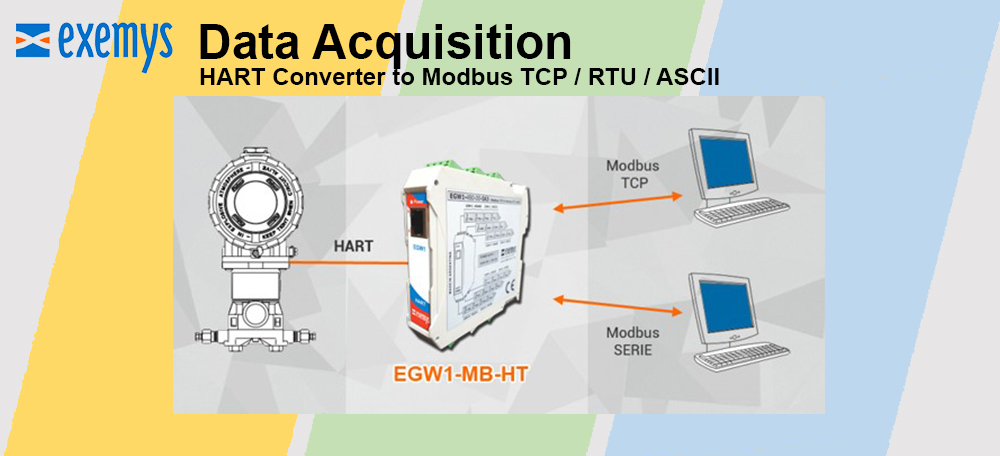

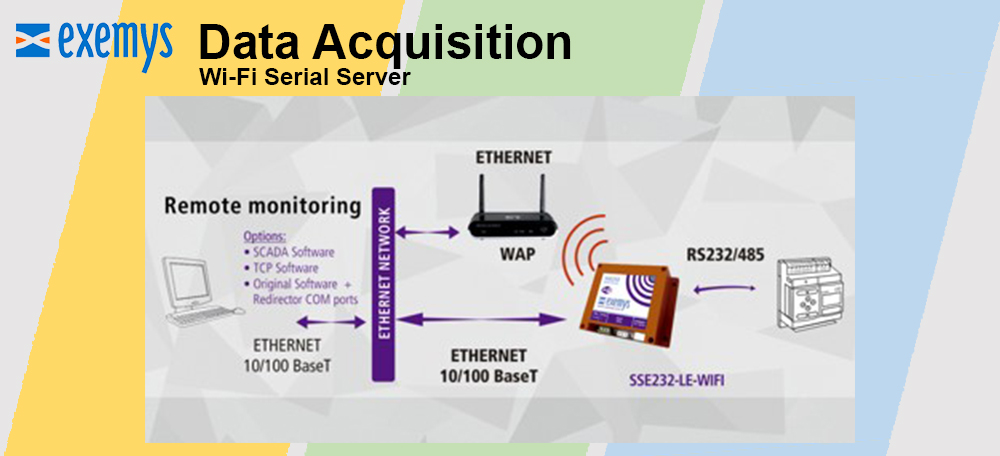

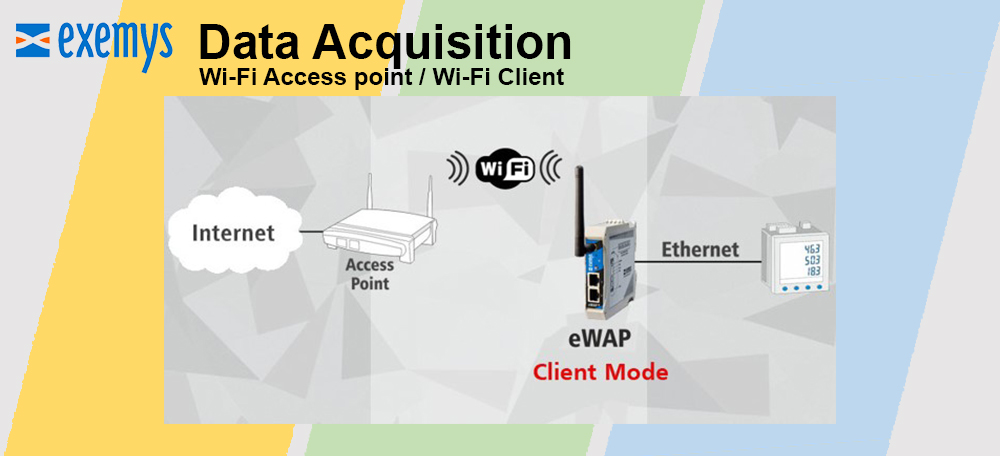


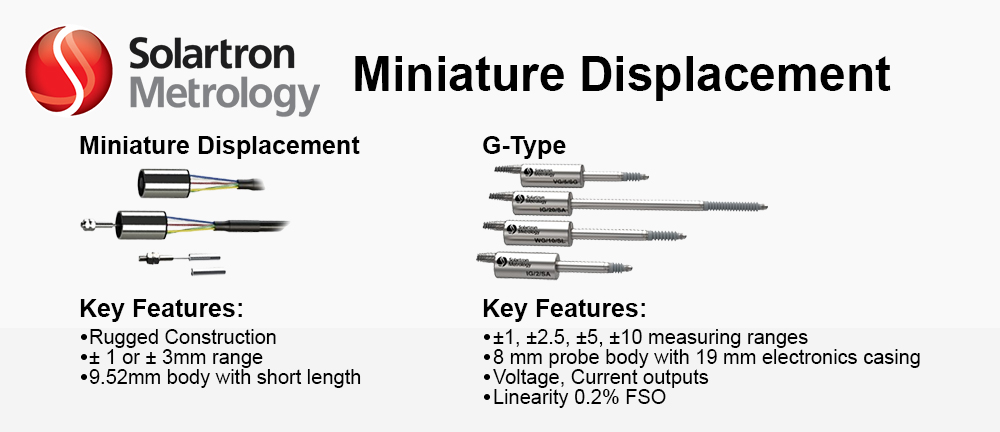
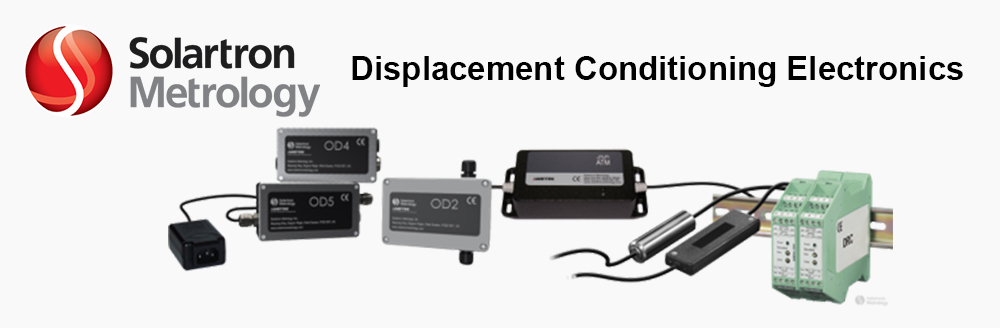
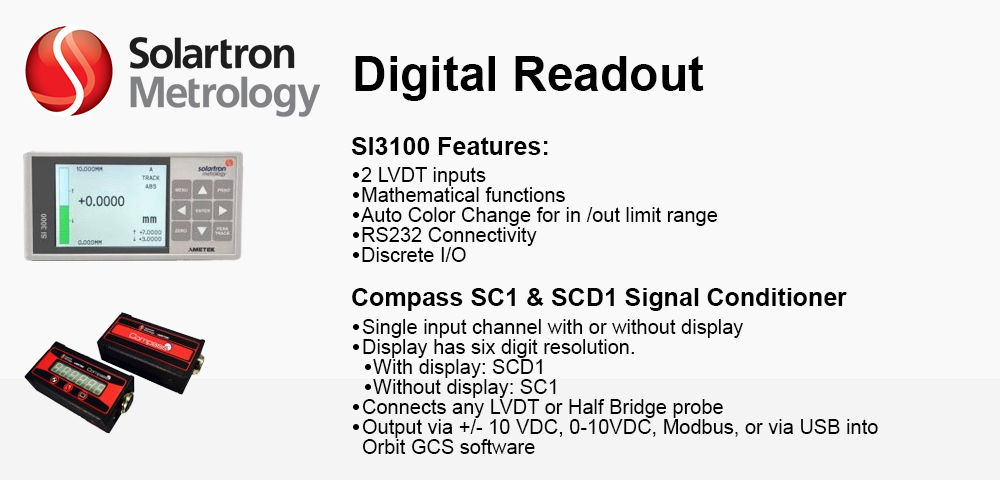

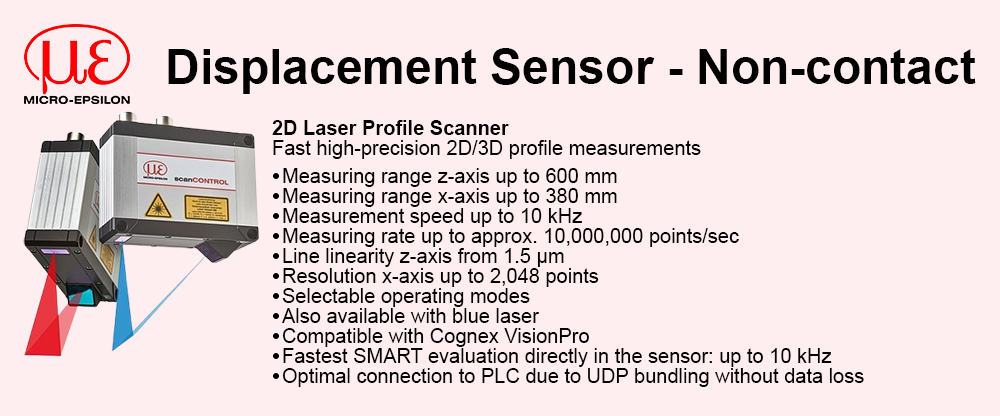


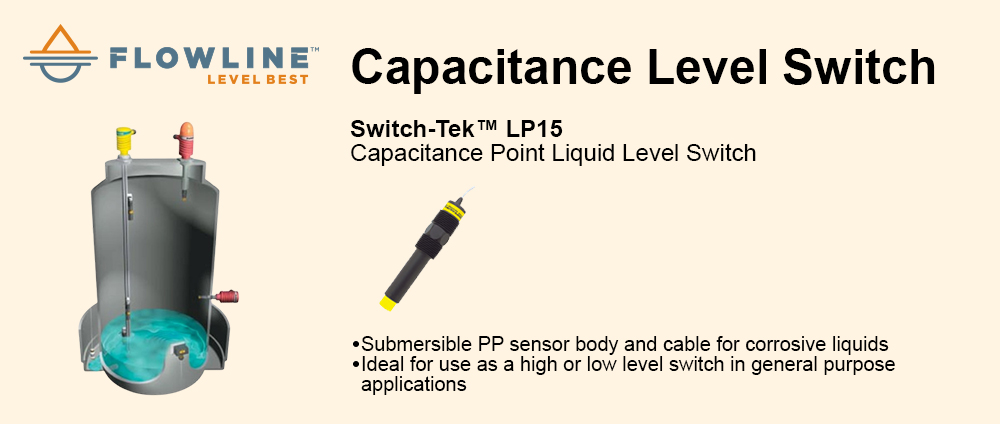


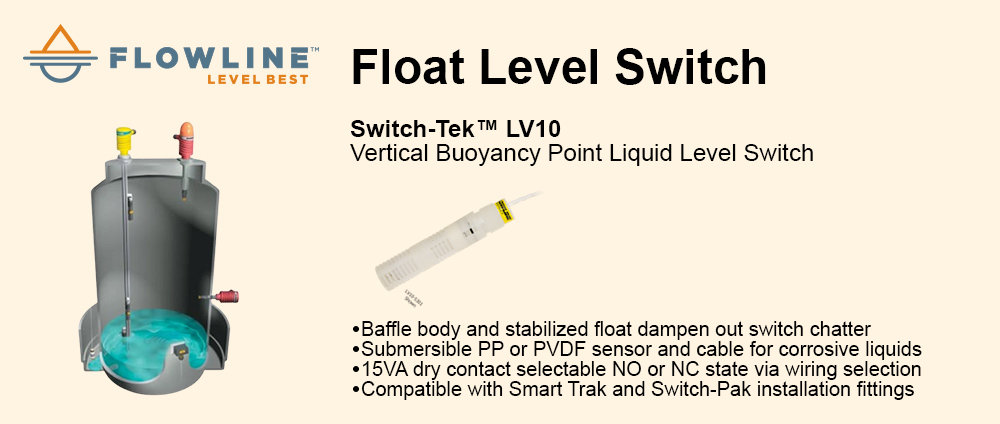
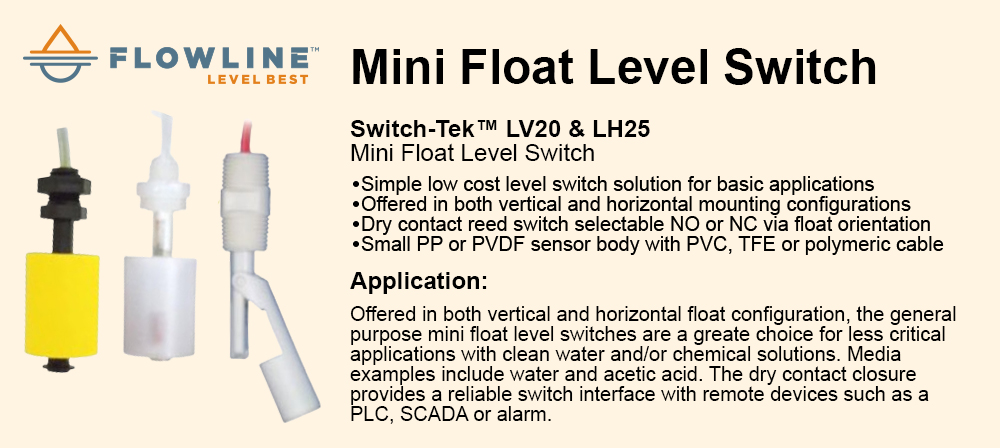


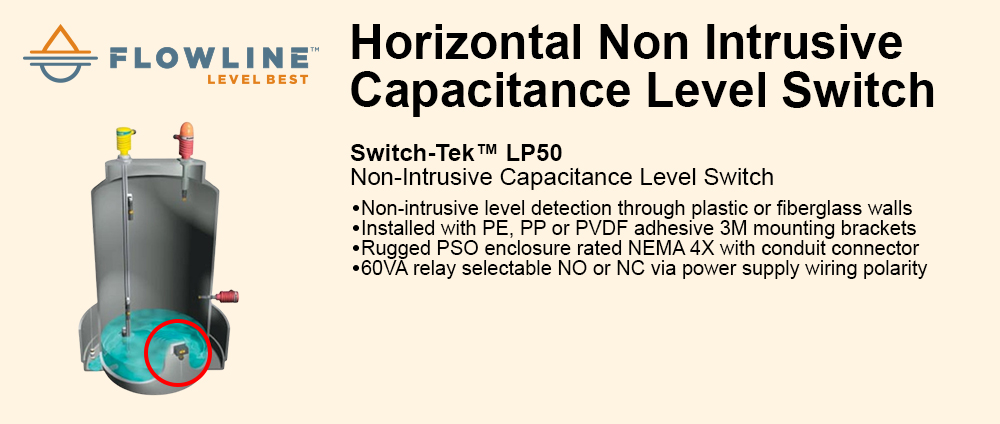


 |
|||||||||||||||||||||||||
Mounting Solution - Panel/Flush MountMounting solution is a collection of different kinds of mounting methods that can help you to know how to mount your product correctly and rapidly. Mounting solution can also guide you to find the product that really fit your needs. |
|||||||||||||||||||||||||
| __________________________________________________________________________________________________________ | |||||||||||||||||||||||||
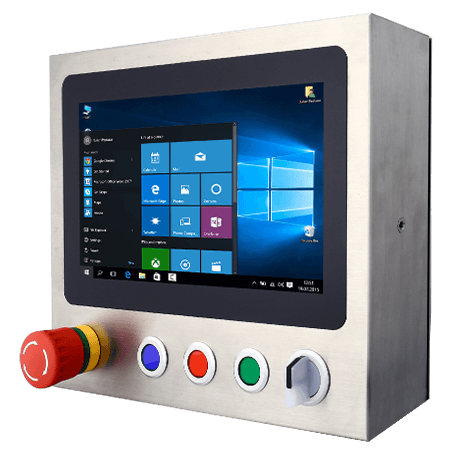
Overview - Panel / Flush Mount (Panel PC)Assembly DiagramPanel PC and Display 5.7" ~ 32" 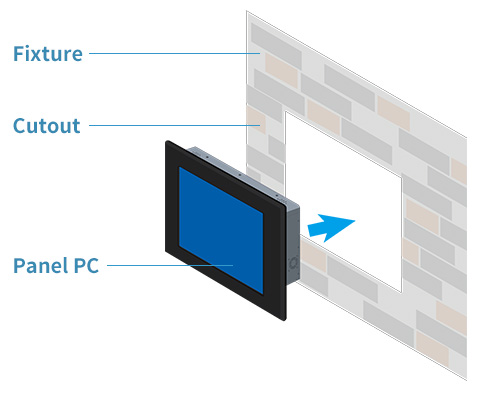 |
|||||||||||||||||||||||||
| __________________________________________________________________________________________________________ | |||||||||||||||||||||||||
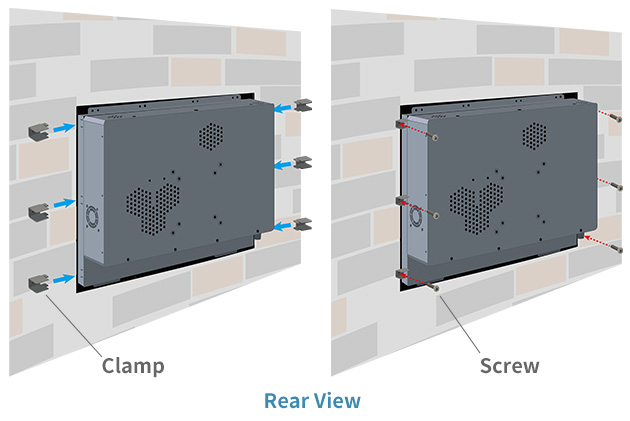
Panel / Flush Mounting KitA set of Panel / Flush Mounting Kit is composed of a clamp and screw. 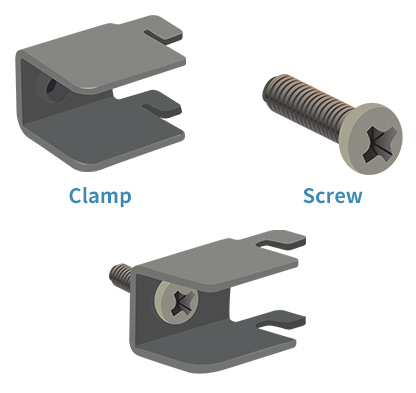 Winmate Mounting Kit
|
|||||||||||||||||||||||||
| __________________________________________________________________________________________________________ | |||||||||||||||||||||||||
Installation Steps
Step 1Make a cutout on the fixture (ex. wall) according to the cutout dimension of the Panel PC. Note: All installation processes are done from the rear side of the fixture. 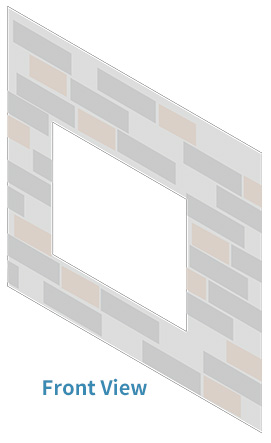
Step 2Place the Panel PC on the fixture from the front side. The sides of the bezel should be visible from outside. 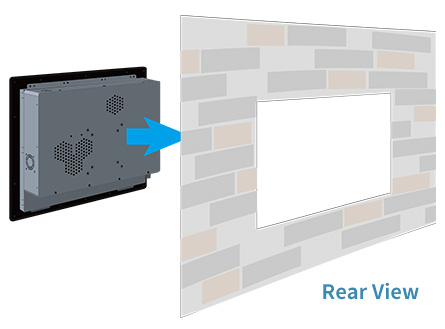 |
|||||||||||||||||||||||||
Step 3Use mounting kit provided by Winmate to secure the Panel PC to the fixture. First install mounting clamp to the Panel PC, and then fasten the screw to fix the clamp to the fixture.
Step 4Installation complete 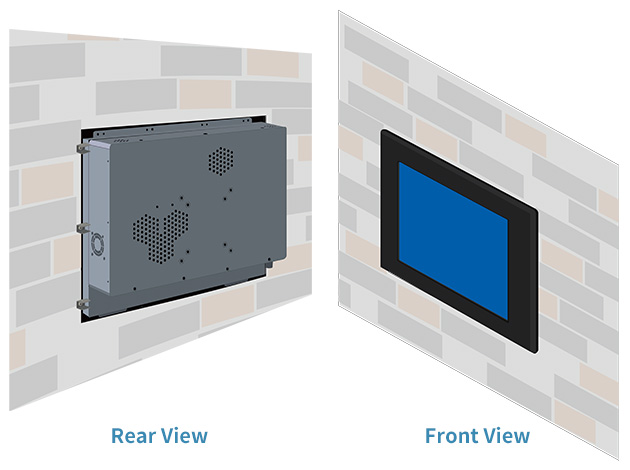 |
|||||||||||||||||||||||||