


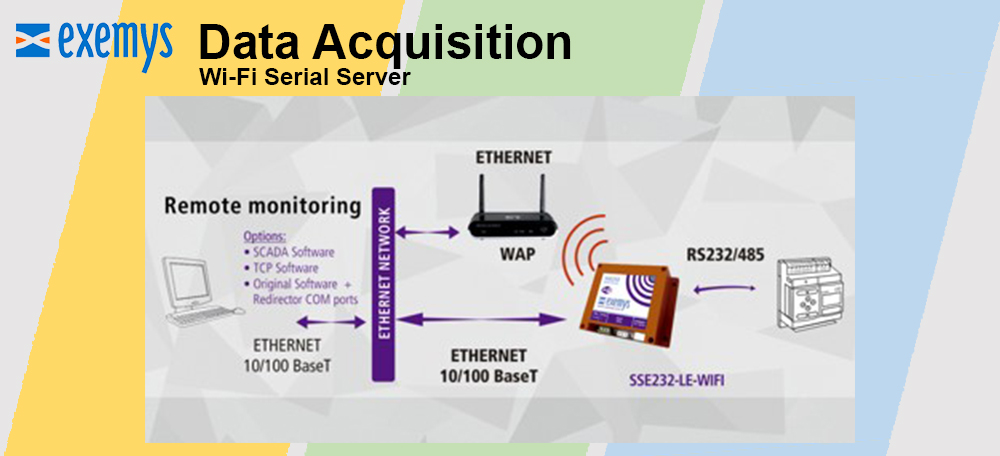

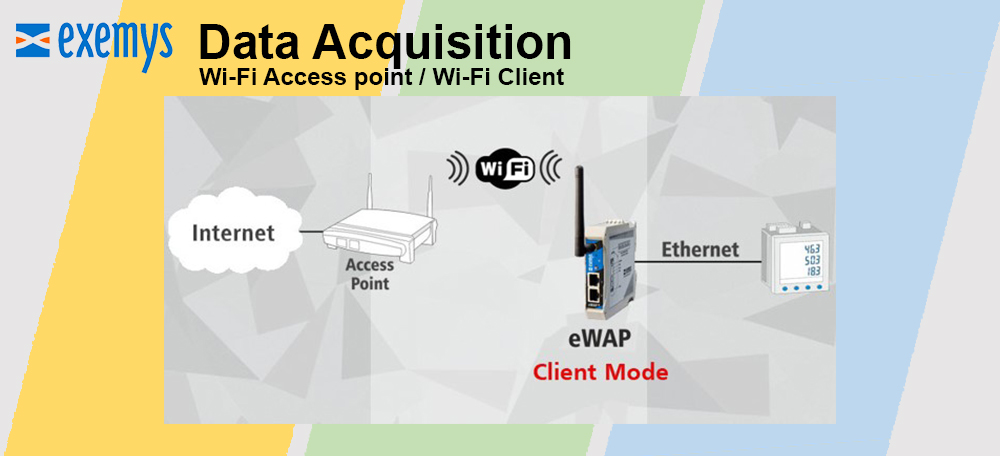
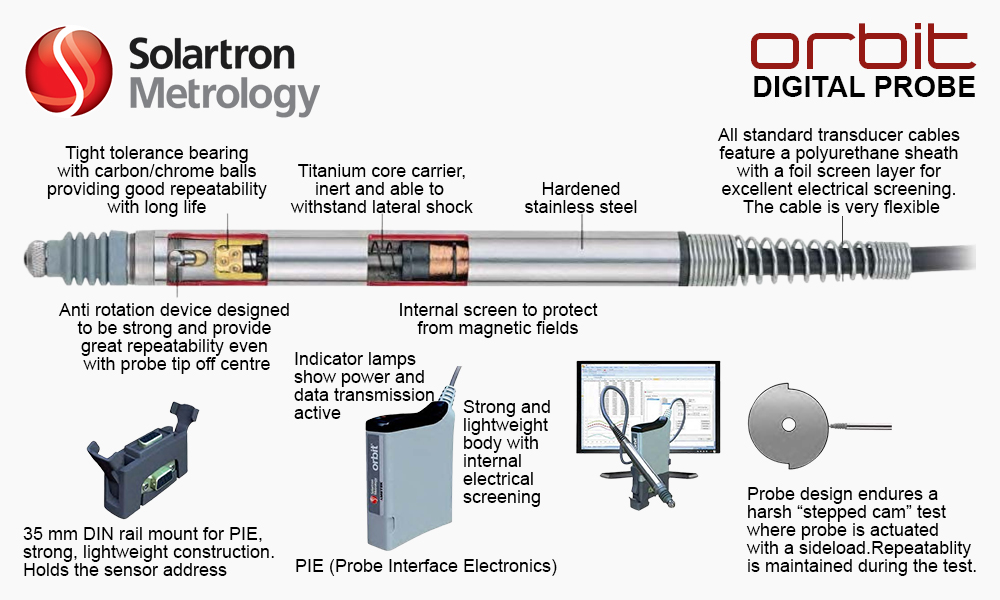


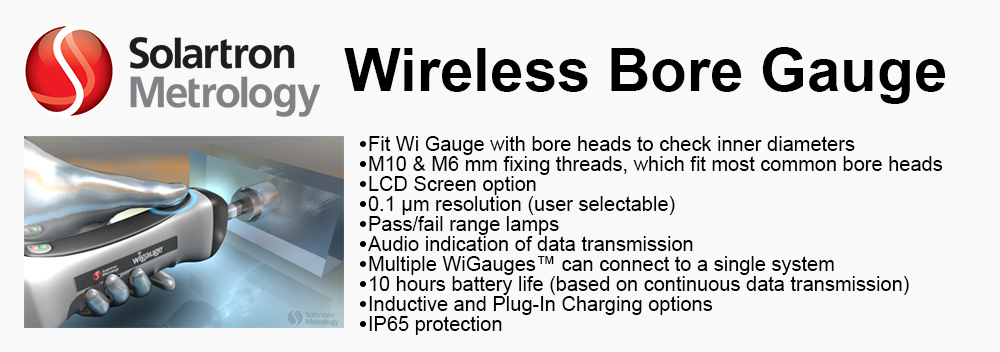
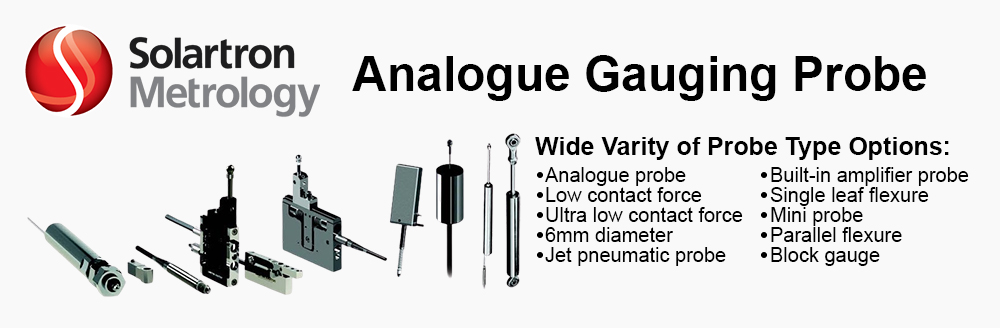


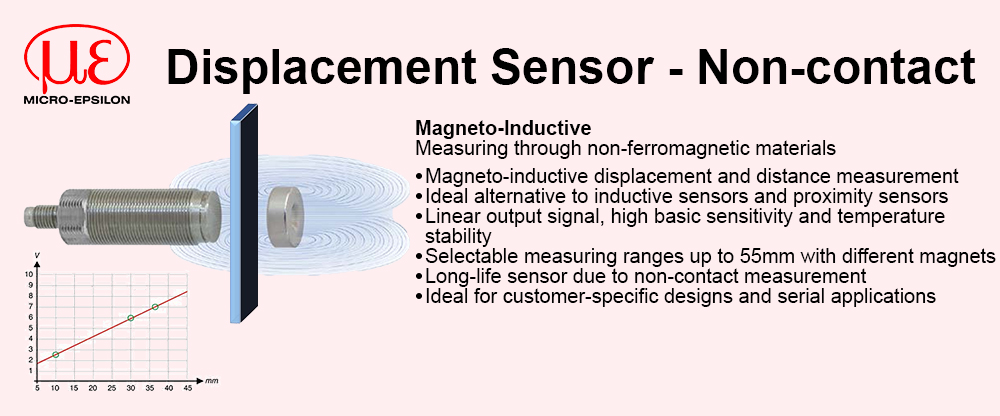


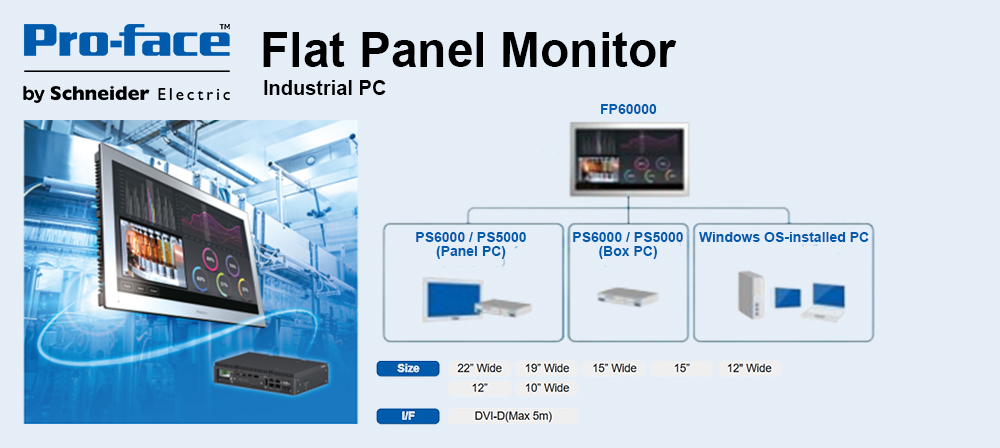

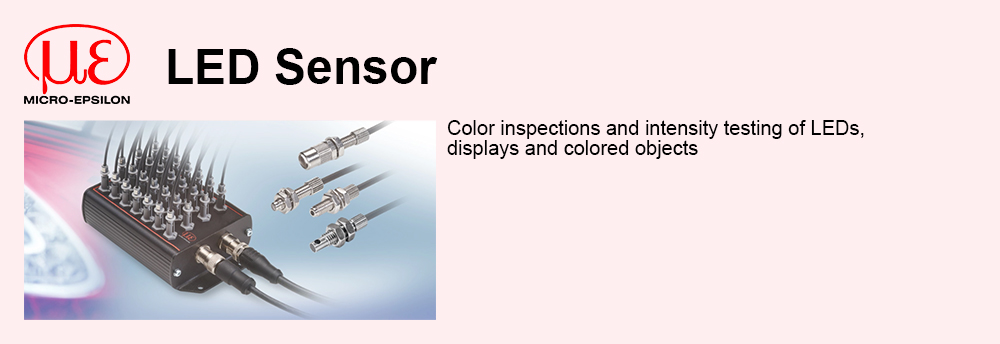


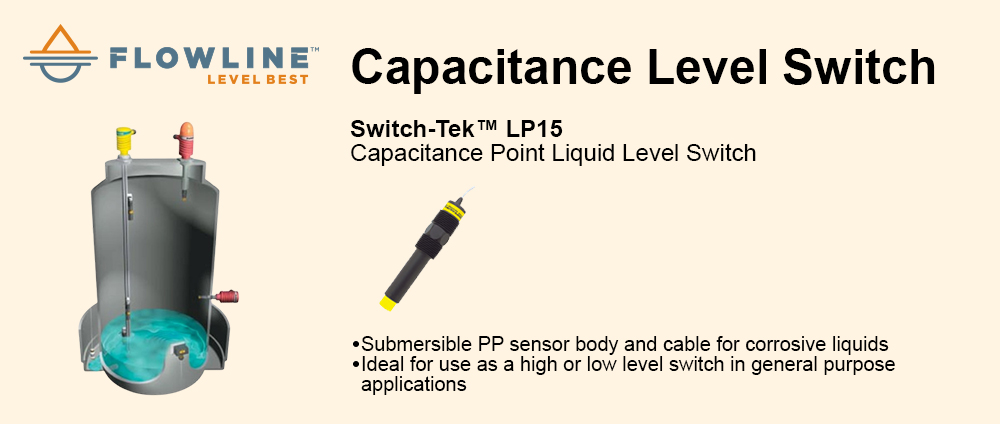


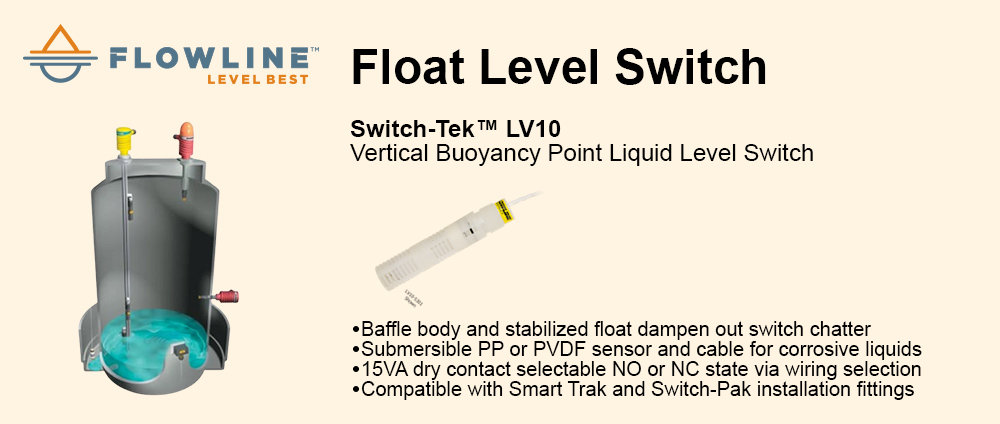
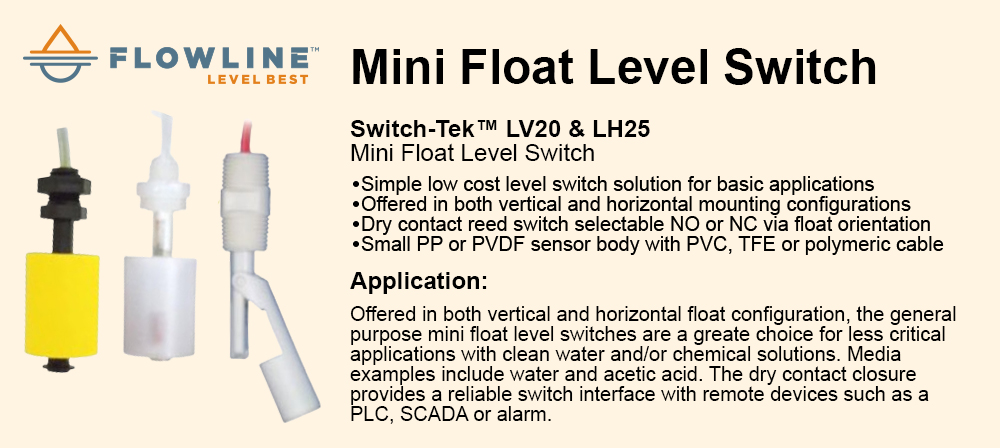


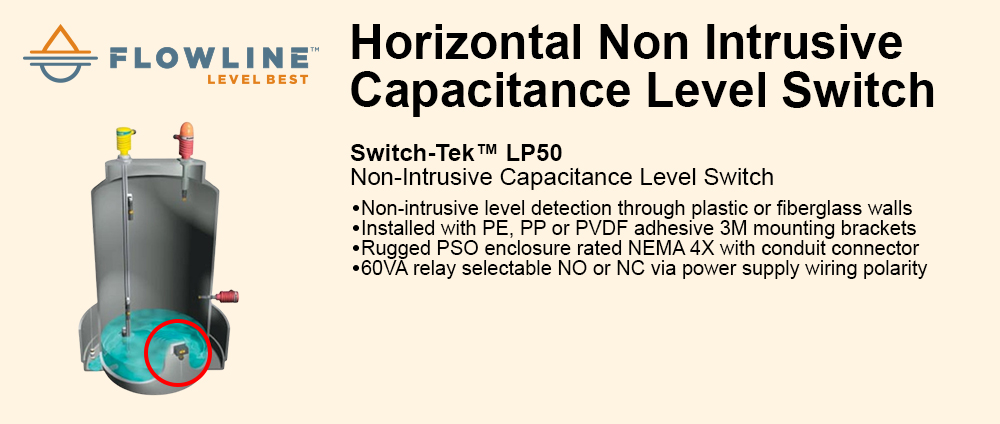


 |
Mounting Solution – Front IP65 Panel PCMounting solution is a collection of different kinds of mounting methods that can help you to know how to mount your product correctly and rapidly. Mounting solution can also guide you to find the product that really fit your needs. |
| __________________________________________________________________________________________________________ |
Overview – Front IP65 Panel PCFront IP65 Panel PC has a special rubber (O-ring) on the rear of front bezel. This design allows sealing the front bezel and customer’s fixture to prevent water and dust from entering the enclosure. 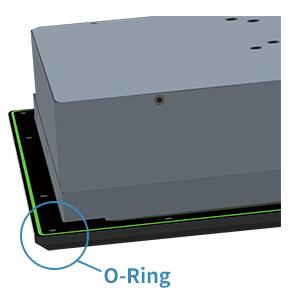  |
| __________________________________________________________________________________________________________ |
Assembly Diagram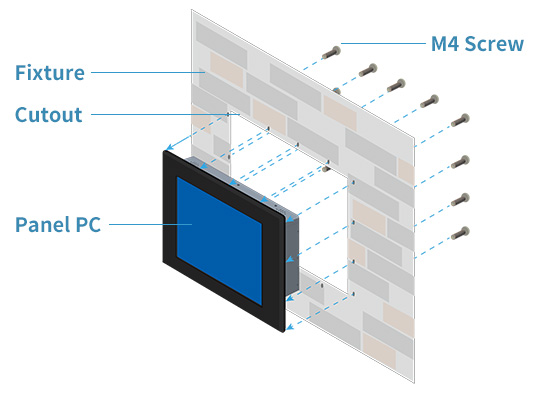 |
| __________________________________________________________________________________________________________ |
Front IP65 Mounting KitFront IP65 Mounting Kit consists of M4 screws. The amount of screws supplied varies by Panel PC size. Note: The thickness of the screw depends on customer's fixture.  |
| __________________________________________________________________________________________________________ |
Installation Step
Step 1Make a cutout on the fixture (ex. wall) according to the cutout dimension of the Panel PC. Note: All installation processes will be done from the rear side of the fixture. 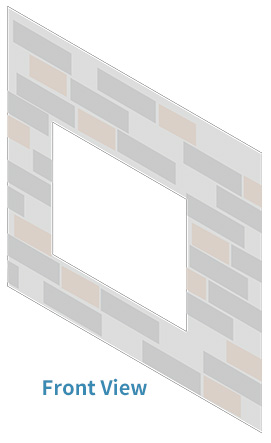
Step 2Based on the drawing mark screw holes on a rear side of the fixture. Place the Panel PC on the fixture from the front side. The sides of the bezel should be visible from outside. 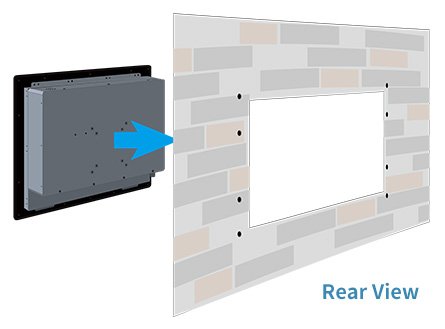 |
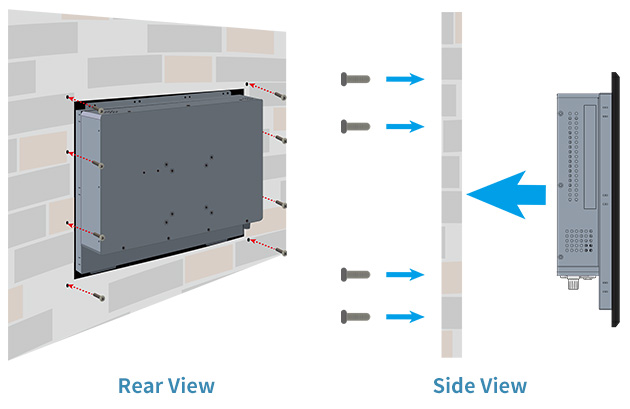
Step 3Use electric screwdriver to fasten M4 screws from the rear side of IP65 front bezel.
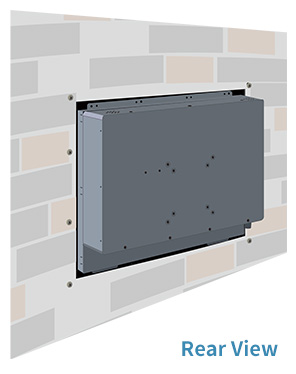
Step 4Installation complete.
Application
|